Working with our students there will always be a need to share information with other professionals and not all will have access to your Provision Map software – this is where the print centre is a handy feature.
The print centre does exactly what you would imagine a print centre does – it ‘prints’ information from within the program – but there are many options in there and print doesn’t necessarily mean using paper and ink!
So, seven top tips on how to use the print centre…
- When you ‘print’ from the print centre it generates pdf versions of the documents. This means you can attach them to emails, secure portals or physically ‘print’.


2. Just before the section where you select the children are two sneaky little radio buttons.
The first option will ‘zip’ all the document types you have chosen into separate files for each named pupil (useful if you want to email them out to a variety of new placements). The second option will produce one zipped file with everything you’ve selected – more useful when you’ve only selected a few children all going to the same place.
3. The top part of the page can look overwhelming! It is offering you the different documents you have created within the system and some options that accompany those. I’ll admit I often forget to click “include archived” for plans and provisions when I’m creating a transfer file and then wonder why historical information is not there!

4. If you wanted to print for a group in one go, it is possible. A great example of this is parent evenings where you might want to collate all of a year group’s plans for staff to give to parents/sign. When you are looking at the pupil list there are options on the left-hand side for different characteristics. You could select one (or more) of these and then click ‘select all’ beneath the names.
5. Have you noticed the check box at the side of some students is greyed out? That means they don’t have any files of the type you have specified at the top.
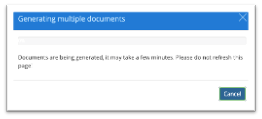
6. It does take time to collect the information from the various parts of the program and collate it into your files. Sometimes your computer will think it’s taking too long and time you out. It is best not to try and print a whole school in one go, but to look at a year group at a time.

7. If you scroll right to the bottom of the characteristics box, there are two extra options
a. One is for archived pupils – perhaps they left your school mid-year and have come off your MIS before you have produced their file to share with their new school, give this box a tick and you’ll be able to pull their information.
Whilst we’re discussing archived pupils – you can find a list of those under ADMIN>Archived pupils should you just want to look at one document rather than their whole file.
b. The second option is for ‘plans I am involved in’ and is useful for anyone wanting to get a copy of everything they might need to report on. (I’m a scribbler…I like to make notes as I go along.)
