Please note: Workflows are in pilot and are currently only available to specific schools.
Depending on your local authority guidelines, you may be required to complete a workflow before a plan can be assigned to a pupil. Provision Map allows you to complete and document the workflow process with Workflows.
Setting up workflows
By default, workflows will not appear as an option in your school’s Provision Map account. To request access to this feature, please contact us so that a member of our staff can activate it for you.
Once we have activated Workflows for your school’s account, mouse over the Admin tab and select School settings from the drop down menu.
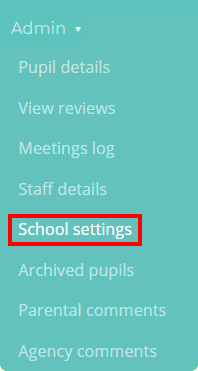
You will be presented with the School Details section, which contains a list of settings that control various features in your school. Set Workflows to Yes.

Staff members will now be able to start workflows for individual pupils.
Creating a new workflow for a pupil
When viewing a pupil’s individual profile, you will now see a section labelled Workflow in the left hand side navigation menu.
![]()
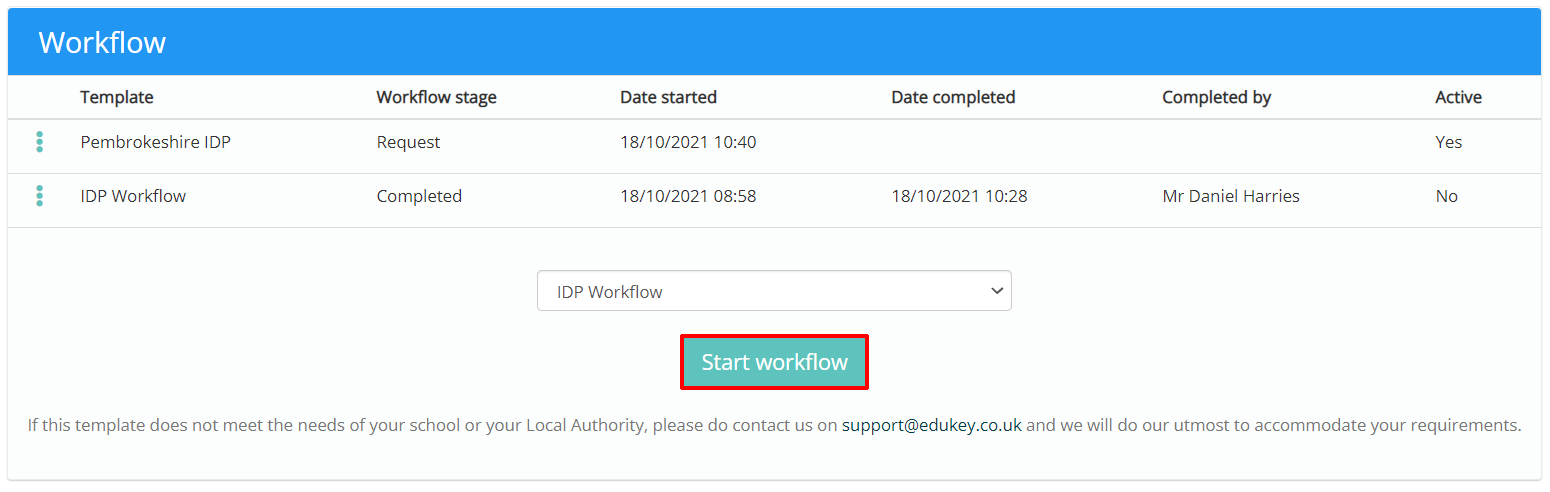
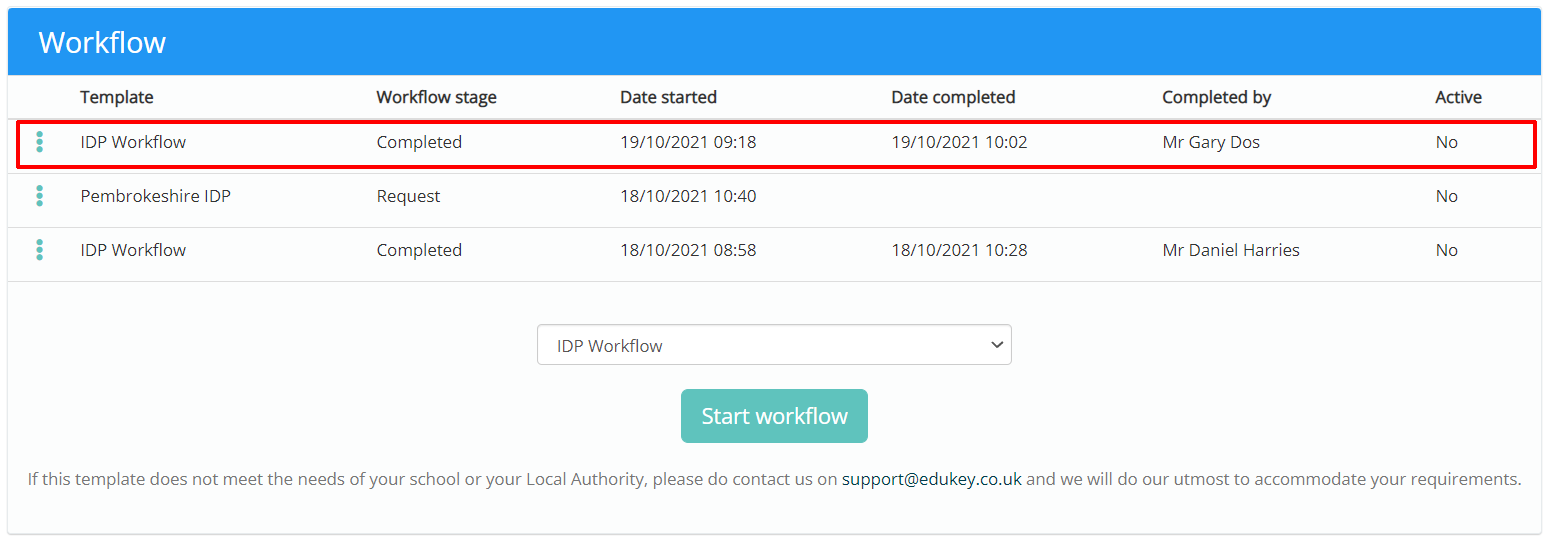
In this section, you will be presented with a list of the pupil’s workflows. This includes completed workflows, the active workflow and any partially completed workflows.
Select the workflow template of your choice from the drop down menu and click on the Start workflow button.
If the pupil already has an active workflow, a confirmation popup will appear. Click on the OK button to continue.

The selected workflow template will be displayed below the pupil’s workflow list. Fill in the form provided, the contents of which may vary depending on the workflow template selected.
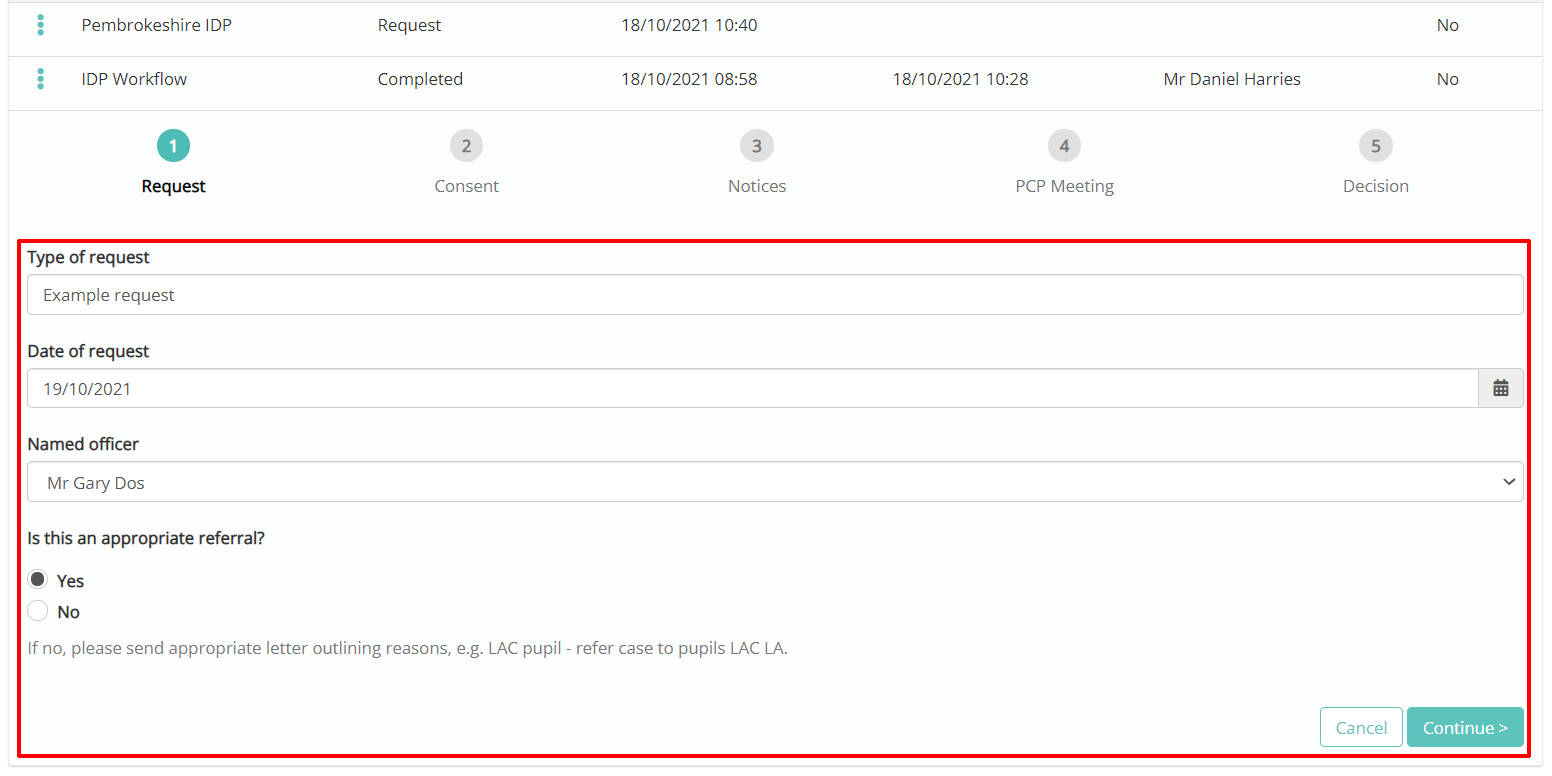
Once you have fully completed a step of the selected workflow, you will be able to move on to the next step. Click on the Continue button to begin the next step.

If you have moved on to another step, you can return to the previous step by clicking on the Back button.

Your overall progress in completing the workflow is shown above the form, where completed steps are displayed in colour.

Once you have reached the final step, the Continue button will change into a Complete Workflow button.
Please Note: Once a workflow has been marked as completed, you will be unable to make additional changes.

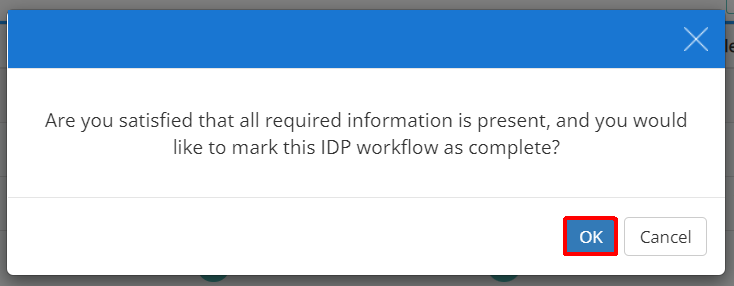
A confirmation popup will appear asking you to confirm your choice. Click on the OK button to continue.
A green confirmation banner will appear, indicating that the selected workflow has been successfully completed.

The completed workflow will have the Date completed and Completed by fields populated in the workflow list, and it will become inactive.
Printing a workflow
As progress is made on a workflow, you can generate a printable copy as a PDF.
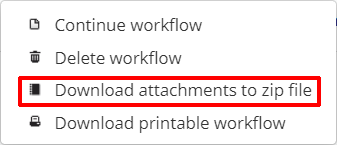
To print a workflow, click on the three dots menu for the incomplete workflow of your choice.

Next, select Download printable workflow from the list of available options.
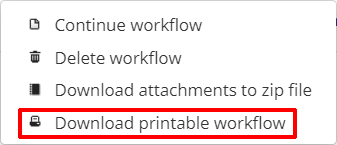
A PDF copy of the workflow will be generated.
If files have been uploaded to the selected workflow, click on the Download attachments to zip file button to generate a copy of the files within one folder.